Sunday, May 20, 2012

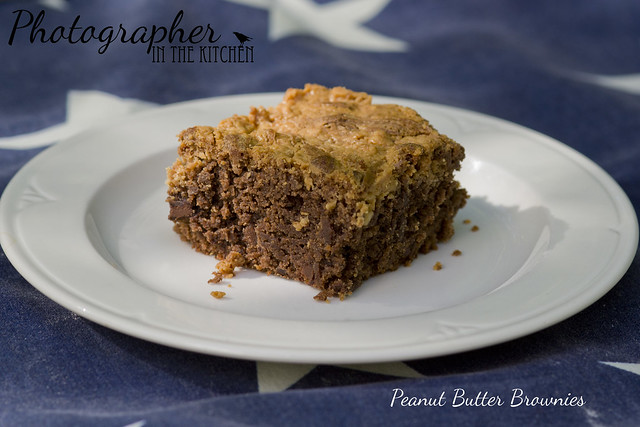
Peanut Butter Swirl Brownies

If you're like me and you love chocolate and peanut butter, then there is almost nothing better to cure your cravings than these Peanut Butter Swirl Brownies.

Let's get started! Shall we?


Brownie Ingredients:
  • 1¼ cups all-purpose flour
  • 1/4 cup unsweetened cocoa powder
  • 1 cup semi-sweet or dark chocolate chips
  • 1 cup butter, margarine, or shortening, cut into 1-inch pieces
  • 1½ cups granulated sugar
  • ½ cup packed light brown sugar
  • 5 eggs
  • 1 teaspoon vanilla extract

Peanut Butter Swirl Topping:


  • 1/4 cup (4 tablespoons) butter, melted
  • 1/2 cup powdered sugar
  • 1 cup peanut butter (creamy or crunchy/chunky, I prefer chunky)
  • 1 teaspoon vanilla extract

Preheat oven to 350 degrees Fahrenheit. Line the bottom of a 9 x 13 glass baking dish with parchment paper, grease the sides of the pan with shortening, so the brownies won't stick. Be sure to leave enough parchment on the two longest sides of the pan, so your will be able to lift the brownies out with the parchment, once they're cooled.

In a small bowl, blend flour and cocoa powder, set aside.

In a large bowl, cream butter and sugars together until smooth, add eggs, beat until blended, then stir in vanilla and chocolate chips. Slowly stir flour mixture into butter mixture, just until blended. You don't want to over-stir, or your brownies will be more like cake.

Pour the batter into your parchment-lined 9 x 13 baking dish.

In a small bowl, mix all of your peanut butter swirl ingredients together, and spoon blobs of it on top of your brownie batter. Run a knife back and forth through the batter repeatedly, until you have a nice swirl pattern.

Bake for about 35 minutes, or until a toothpick inserted into the center of the brownies comes out slightly damp, but without raw batter on it. Let the brownies cool for about 20-30 minutes, then lift them out of the pan, and cut them into squares.

Makes about 16-20 brownies, depending on how you cut them. Enjoy!


Saturday, May 19, 2012

Corned Beef Hash Pinwheels

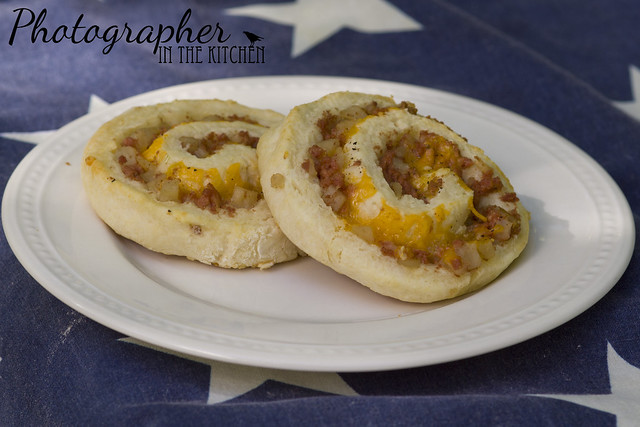
Today I'm cooking something called Corned Beef Hash Pinwheels. I adapted the recipe from one that my Grandmother taught me when I was little. It's basically a can of corned beef hash rolled into some biscuit dough. These little rolls make a great snack, picnic food, or quick dinner. Kids love them, and you can pop one in their lunch box for school. They taste good hot or cold.


Ingredients:

  • 3 cups Bisquick Mix
  • 1 cup milk (you may need a little extra)
  • 4 Tbsp butter - softened
  • 1 large can (or two small cans) corned beef hash
  • 1 cup shredded cheddar cheese
  • garlic powder
  • dried minced onions (or onion powder)
  • ground black pepper
Preheat oven to 450 degrees Fahrenheit.

Combine Bisquick mix and milk until a soft dough forms. If it is too dry, add a little more milk, and if you get it too wet, you can always add a little more Bisquick to dry it up.

Roll out your dough to a 1/4 inch thickness, about 26 inches long, and 6-8 inches wide.

Spread a thin layer of the softened butter over the dough, then spoon the corned beef hash on top. Be sure to spread both evenly to cover the entire surface of the biscuit dough. After that, sprinkle on the cheddar cheese in a thin, even layer.

Sprinkle a little of each of the remaining ingredients over the cheese, it's really up to you how much you use. I would say not to use more than a 1/4 teaspoon of garlic and pepper.

If you're using dried minced onions, you can probably use a good teaspoon of those, if you're using onion powder, a 1/4 teaspoon should be enough.

Beginning with the long edge nearest you, roll the dough into a tight cylinder. Firmly pinch the seam to seal and roll the cylinder seam side down. Gently squeeze the cylinder to create even thickness. Using a serrated knife, slice the cylinder into 1 inch slices, making about 25 pinwheels.

Place them on a greased cookie sheet about an inch apart, and bake them for 8-10 minutes, or until they are lightly browned.


Wednesday, May 9, 2012

Hello everyone, and welcome to my recipe blog! I'm a landscape photographer that also enjoys cooking and baking, so I'm here to share some of my favorite recipes with you.

I will be posting those recipes as soon as my new lighting arrives, so be patient, and go have a look at my online photo gallery .You can view my work at any time by clicking the links on the tabs above. You may also follow me on Pinterest, or become my fan on Facebook.