Thursday, August 1, 2013

Mongolian Beef with Sticky Rice

Lately I've been crazy for asian-style food. I've been testing a lot of different dishes lately, and this Mongolian Beef recipe is by-far my favorite I've tried. If you like the Mongolian Beef at P.F. Changs, you'll love this stuff, because it tastes even better!

Don't take my word for it though, try it yourself, and let me know what you think.

Serves: 4
Prep/Cooking time: 30-45 minutes


INGREDIENTS:

Meat:

  • Canola oil for frying
  • 2lb flank steak (you can also use top sirloin)
  • 1/3 cup cornstarch (or potato starch)
  • 2 Tbsp. Hoisin Sauce
  • 1/4 cup reduced-sodium soy sauce

Sauce:

  • 1 Tbsp. Canola Oil
  • 1 tsp. minced or grated ginger (fresh)
  • 3-4 cloves of fresh garlic, minced
  • 1/2 cup reduced-sodium soy sauce
  • 1/2 cup water
  • 1 cup dark brown sugar
Topping:
  • 4-5 green onions, chopped

Rice:

  • 2 cups long-grain white rice (not instant)
  • 4 cups water
  • 1/2 tsp. sea salt
Slice the steak at an angle, against the grain, into 1/4-inch thick pieces. Throw it in a bowl and mix with starch until evenly coated. Add Hoisin and soy sauces, mix until steak is thoroughly coated. Set steak in the fridge for 20-30 minutes. 

While your steak is marinating, you can prepare the sauce. Warm the oil over medium heat in a sauce pan, but don't let it get too hot. Add your garlic and ginger, cook for about 1 minute or less, but don't scorch the garlic! Add the soy sauce and brown sugar. Stir until sugar is dissolved, then let the sauce boil for 2-3 minutes, or until it thickens a bit. Remove from heat and set aside. 

Next you'll want to start cooking your sticky rice so it's ready when your steak is. First pour your rice into a bowl, and fill it with warm water. Stir the rice around for a minute or two, until the water becomes cloudy. Strain out the rice, and put it in a sauce pan. Add 4 cups of cold water to the pan, and cook it according to the package instructions. 

In a large frying pan, heat enough canola oil to fry the steak, then add the steak, carefully laying each slice down flat in the pan. Fry for about 2 minutes on each side. Do not over-crowd the pan with the steak, you may have to do it in 2-3 batches, depending on how many slices you cut. 

After you're done cooking all the meat, pour the oil out, and put the meat back in the pan. Cook it for about a minute, then pour the sauce over it and let it cook for another minute or two. Add your chopped green onions, and cook for one more minute. 

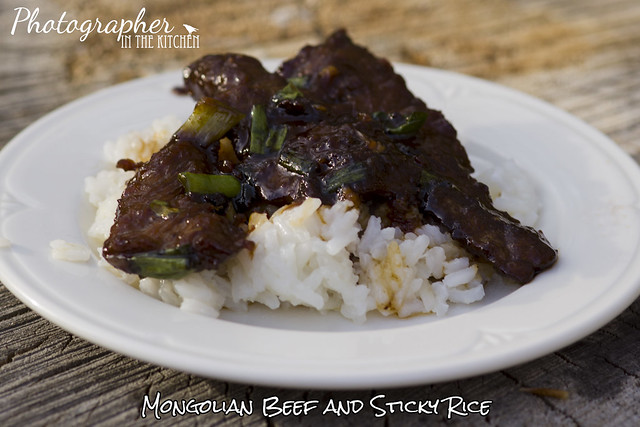
Serve the beef on top of the rice, or on the side, whichever you prefer. You can leave the extra sauce in the pan, or if you like lots of flavor, you can drizzle it on top of your beef & rice. Enjoy!


Saturday, December 15, 2012

Molasses Cookies

Today I'm going to share with your one of my most favorite cookie recipes ever. I have memories of baking these cookies with my Grandma, rolling out the dough, choosing the cookie cutters to use. My home just doesn't feel like Christmas until the smell of these baking in the oven fills the air. These cookies have been a part of my Christmas holiday my whole life.

These cookies don't have to be reserved for Christmas, they can be enjoyed all year-round! They're just as fun to do at Halloween too!

This recipe is large enough that you will have many cookies to give to friends and family, but beware, they will come back year after year asking you to make them again!

INGREDIENTS:

7 c. flour
2 tsp. baking soda
1 tsp. salt
1/4 c. cocoa powder
4 tsp. ground ginger
2 Tbsp. ground cinnamon
4 tsp. ground cloves
2 c. butter, softened
2 c. sugar
2 eggs
1 c. molasses

In a medium bowl, sift together all dry ingredients, set aside. In a large bowl, beat butter until creamy, add sugar, beat until well blended. Beat in eggs and molasses. Gradually stir in flour mixture. blend well. You may add up to 1/2 cup more flour of dough is too sticky. Wrap dough in plastic wrap or wax paper and refrigerate for about 2 hours.

Preheat oven at 350 degrees Fahrenheit.

Cut dough into 4 portions, roll out each portion to about 1/4 inch thickness. Be sure to roll on a floured surface to avoid sticking. Use any cookie cutters of your choice. Place cookies on cookie sheets lined with parchment about 1-2 inches apart.

Bake cookies 10-12 minutes. Let stand about 5 minutes before transferring them to a cooling rack. Let cookies cool completely before frosting them.

ICING:

Frosting these cookies will take 3-4 pounds of powdered sugar. I usually make 4-5 colors of frosting for these cookies. This recipe is for 1 colored batch of frosting. You will need to make several batches to frost all the cookies in the recipe.

2 c. powdered sugar
1/4 tsp. cream of tartar
1/2 tsp. pure vanilla extract
food coloring
water

Mix all ingredients together. How much food coloring you use is entirely up to you, depending on the color you're going for. As for the water, just mix in about 1 Tbsp to start, and add a few drops at a time until your frosting is desired thickness. This frosting dries pretty firm no matter how tick or thin you make it.

Cookies can be stored in an airtight container for about two or three weeks, but they probably won't last that long anyway!

PHOTO COMING SOON!

Thursday, June 28, 2012

Easy Turkey Fritters

I am really into fritters at the moment. I love mixing ingredients, and plopping them into a frying pan of hot oil, listening to them sizzle and pop. The smell is amazing as well. So here it is, my latest addition to my fritter family. This is a great recipe to make if you have a lot of leftover turkey from those holiday meals. 


Turkey Fritters

  • 2 eggs
  • 2 Tbsp. Coconut oil (melted) - you can use butter instead if you don't have coconut oil.
  • 1/2 c. milk
  • 1/4 c. flour
  • 3/4 c. Panko bread crumbs
  • 1/2 tsp. baking powder
  • 1 tsp. salt 
  • 1 tsp. poultry seasoning or sage
  • 1 Tbsp dried onion flakes - or half a sweet onion
  • 1 carrot - shredded
  • 1 1/2 c. leftover turkey or chicken
  • 1/3 c. Canola oil for frying

Beat eggs, add coconut oil (or butter), milk, dry ingredients; beat until smooth. Stir in onion, carrot, and turkey or chicken. Heat Canola oil in large frying pan, drop mixture from spoon, fry until brown on both sides and cooked through. You can serve with cranberry sauce or gravy. 


Makes about 6-8 fritters.


Thursday, June 21, 2012

Cinnamon Orange Rolls

Cinnamon rolls have always been one of my favorite breakfast foods. There is nothing like waking up to the smell of cinnamon rolls, warm in the oven, just waiting to be glazed and eaten.

In this recipe, I take it one step further on the yummy chart, by adding a burst of orange flavor to these little bites of Heaven.


Rolls:

1/4 cup sugar
2 Tbsp ground cinnamon

2 1/2 cups Bisquick Mix
3 Tbsp sugar
1 Tbsp orange zest
2/3 cup milk
3 Tbsp butter (softened)

Glaze:

1 1/2 cups powdered sugar
2 Tbsp orange juice
1 tsp vanilla extract

Preheat oven to 375 degrees F. Grease a 9 x 13 baking pan. In a small bowl, mix the 1/4 cup sugar and cinnamon together, set aside.

In a medium bowl, add the Bisquick, 3 Tbsp sugar, orange zest, and milk. Stir until a nice soft dough forms. Sprinkle with additional Bisquick if the dough is too sticky.

Dust your counter-top with Bisquick, and turn your dough out onto it, then give it an additional dusting of Bisquick, and knead 10 times. Then with a rolling pin, roll the dough into a rectangle that is roughly 15 x 9 inches. Spread the butter over the surface of the dough, then sprinkle with your cinnamon-sugar mix.

Roll up your dough tightly at the 15-inch side, seal by pinching the edges and ends together. Cut into 1 1/2-inch slices, and place the slices in your pan.

Bake for 20-25 minutes, or until they're a nice golden brown. Let cool for 5 minutes before removing them from the pan. Glaze and serve.


Tuesday, May 29, 2012

Tuna Fritters Recipe

Tuna fritters are simple to make, so if you're pressed for time, you can whip these up in 30 minutes or less. They are delish served either cold or hot and make great snacks for after school, parties, or picnics.

You can make a double batch, serve half for dinner, put the other half in the fridge for a quick anytime-snack the next day.


Ingredients:

  • 12oz can chunk light tuna, drained (You can also use a can of Salmon )
  • 1 small sweet onion, chopped
  • 1 tablespoon finely chopped fresh parsley (You can also use dried)
  • 2 eggs, beaten
  • 2/3 cup all-purpose flour 
  • 1 cup Panko (japanese bread crumbs)
  • 1 medium carrot, peeled and grated
  • 2-3 potatoes (about 2 cups), peeled and grated
  • 1/2 tsp dried dill 
  • 1/4 tsp garlic powder
  • 1/2 tsp salt, 
  • dash of pepper
  • ½ cup of canola oil 
Combine the tuna (or salmon), onion, parsley, eggs, grated carrot and flour in a medium bowl.
Peel potatoes, grate them into the mixture.
Add remaining ingredients, stir until well blended.
Heat oil in a frying pan, make patties out of about 1/4 cup of tuna mixture and fry fritters in batches of a few at a time, until golden brown on both sides and firm. Drain on a wire rack, or paper towels.
Serve the tuna fritters with tarter sauce and lemon wedges, if desired.

Tarter Sauce:

1 cup Mayonnaise (or Miracle Whip)
1/4 cup dill relish
1 Tbsp lemon juice

Mix and serve.

Chewy Peanut Butter Cookies

Peanut butter cookies have always been one of my favorite types of cookie. I have tried many different recipes, and this one is my favorite.

This recipe is very versatile, you can use creamy or crunchy peanut butter, you can use butter, shortening, oil, or a combination of these.

As for the sugar, you can substitute that as well. You can use Agave or maple syrup instead of sugar. It's all up to you!


  Ingredients
  • 1 cup unsalted butter (or shortening, or canola oil)
  • 1 cup crunchy or creamy peanut butter
  • 1 cup white sugar
  • 1 cup packed brown sugar
  • 2 eggs
  • 1 teaspoon vanilla extract
  • 2 3/4 cups all-purpose flour
  • 1 teaspoon baking powder
  • 1 1/2 teaspoons baking soda
  • 1/2 teaspoon sea salt or kosher salt

 Preheat oven to 375 degrees.

Cream together butter, peanut butter and sugars. Beat in eggs and vanilla.
In a separate bowl, sift together flour, baking powder, baking soda, and salt. Stir into batter. Put in refrigerator for 30-60 minutes.
Roll into 1 inch balls and put on baking sheets about 2 inches apart. Bake in oven for about 10 minutes or until cookies begin to brown. Do not over-bake. Let cool 5 minutes before removing cookies from baking sheet.

NOTE: For a more crunchy cookie, flatten each ball with a fork, making a criss-cross pattern before baking.


Wednesday, May 23, 2012

Homemade Milk Bones (wheat-free)

Today I'm going to show you how to make some milk bones for your pampered pooch.

I started making homemade dog treats when I discovered that my German Shepherd "Etta Velvet" was allergic to wheat. She gets big hives all over her face and head when she eats any amount of wheat.

Wheat-free dog treats are not always easy to find, and when you do find them, they can be pretty expensive.

I have many recipes for wheat-free dog treats to share with you, but I'll start off with the easiest, most inexpensive recipe first.

If your dog doesn't have a wheat sensitivity, you don't have to use any special flour, 4 cups of whole wheat flour will do just fine. If you plan to use whole wheat flour, you do not have to add the baking powder.


Ingredients:
  • 1 cup hot water
  • 1/2 cup butter
  • 3/4 cup powdered milk
  • 1/2 teaspoon salt
  • 1 egg, beaten
  • 4tsp baking powder
  • 2 cups oat flour
  • 2 cups rice flour
  • 1/4 cup corn starch

Preheat oven to 325 degrees. 

In large bowl pour hot water over the butter. Stir in powdered milk, salt, and egg. Add flour, one cup at a time. Knead for a few minutes to form stiff dough. If dough is too sticky, sprinkle with corn starch while kneading. Sprinkle some corn starch on the counter top as well. Pat or roll to 1/2 inch thickness. Cut into bone shapes, or whatever shape you desire. Bake for 50 minutes for wheat flour, 60-65 minutes for oat/rice flour. Let cool. They will dry out quite hard. 

You can store them in an air-tight jar or can for about two weeks, but your dog will probably gobble them up before that. 

Note: The oat/rice flour biscuits will be a bit more fragile than wheat biscuits, they tend to crumble a bit, so it's best to make smaller cookies.